Top Social

A Mountain Mama's Epicure

All Things Fitness, Wellness, Crafting & Parenting

Featured Posts Slider

Showing posts with label Crafts. Show all posts

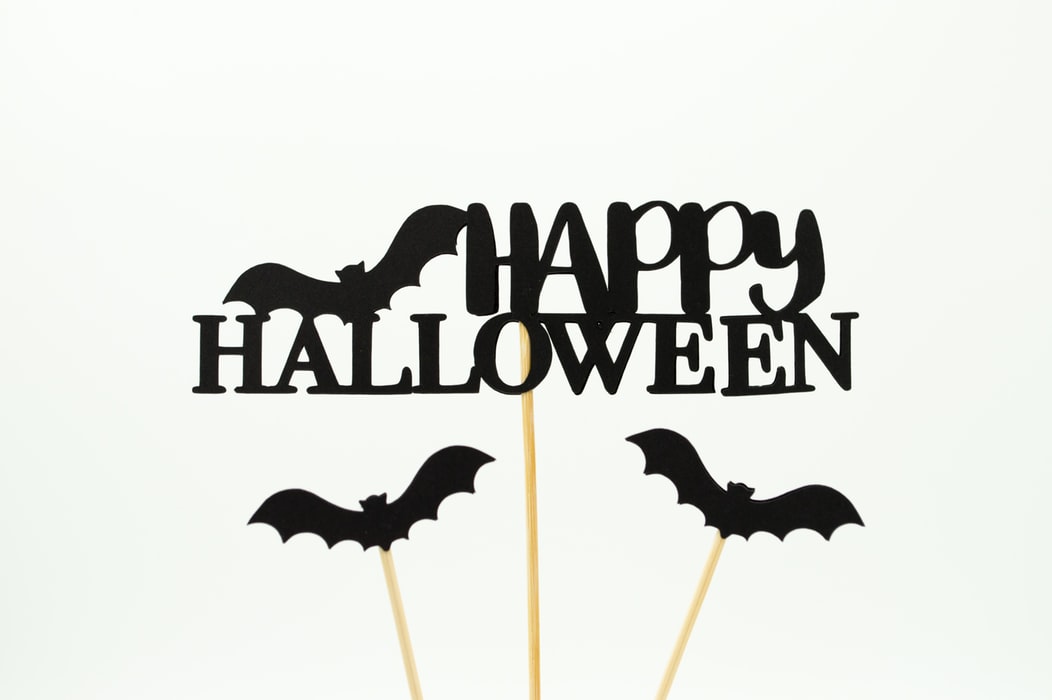
The Makings of a Great Halloween Party


Halloween is a holiday that is filled with spooky fun. Kids love to don their costumes and collect bags full of candy. But trick-or-treating isn't the only thing to do on Halloween. It's also a great time to party!

Adults and teenagers often have or attend Halloween parties. But they're great for kids, too. Organizing a Halloween party provides an alternative for kids whose parents would prefer that they do not go door to door. And moms and dads can get in on the fun too!


Invitations should reflect the theme of your party,

whether it's a general Halloween theme or a specific theme such as pirates or movie characters. You can find a variety of Halloween party invitations at most party supply stores, or you could make your own using a computer program or scrapbooking supplies. Send them out about two weeks prior to the party.

There's no better excuse to have a costume party than Halloween!


Many guests will assume that it's a costume party, but be sure to specify on the invitations so that there is no confusion. If you want the adults in attendance to dress up, encourage them to do so. You could even have a costume contest with prizes. You could also have some Halloween-themed games such as wrap the mummy, bobbing for apples, pumpkin bowling or pin the nose on the jack o'lantern.

Decorating is always important for a great Halloween party.


Fake spider webs and sheets covering the furniture are great for creating a creepy atmosphere without too much expense. You could carve up some jack o'lanterns and sit them around the house. A fog machine adds a nice touch, as do black lights. Make a CD featuring some scary songs and sound effects to add to the atmosphere.

For kids who are coming to the party instead of trick-or-treating,

it's good to provide some treats for them to take home. You could ask each guest to bring a bag of candy, mix it all up, and fill up goody bags for the kids to take home. Halloween-themed party favors could also be mixed in, or even substituted for the sweets.

For the party itself, you'll need some spooky treats.


You could make cookies in the shape of spiders, bats or black cats, cupcakes with cookie tombstones and jack o'lantern sandwiches. For a scary beverage, fill a plastic glove with water, tie the end, and freeze it. Remove the glove and put the frozen “hand” in a bowl of red punch.

Organizing a great Halloween party is a lot of work. But it's also lots of fun, as is the party itself. By carefully planning your bash, you can ensure a good time for all.

Check out this video from HGTV Handmade for more fun ideas!

How to Make a Ghost Windsock for Halloween


In the spring and summer, colorful windsocks make beautiful decorations that blow in the breeze. But for Halloween, you need something spooky to set the mood. How about a ghost windsock? They're easy and fun to make, and they're scary without being too horrific for small children. Here are two ways to make them.

How to Make a Foam Ghost Windsock:

What You Need:

* White craft foam * Black craft foam * White garbage bag * Craft glue * Scissors * Hole punch * Stapler * White string or twine

Instructions:

1. Cut a pair of eyes, a nose and a mouth out of the black craft foam. Glue them to the front of the white craft foam. 2. Cut the garbage bag into long, one to two inch wide strips. Glue them to the bottom of the piece of craft foam. Let dry. 3. Bring the right edge of the craft foam around to the left edge, forming a tube. Glue or staple together. 4. Using the hole punch, make three holes spaced evenly around the top of the windsock. Cut three pieces of string or twine, about two feet long each. Tie one string through each hole, then bring the strings together over the ghost and tie. 5. Hang your windsock from your porch or a tree branch.

How to Make a Poster Board Ghost Windsock

What You Need:

* Small white poster board * Black permanent marker * Hole punch * White crepe paper streamers * Craft glue * Stapler * String or twine

Instructions:

1. Place the poster board lengthwise. Use the black permanent marker to draw on a ghostly face. 2. Cut streamers into lengths of two to three feet. Glue them onto the bottom of the poster board. Let dry. 3. Roll the poster board into a tube shape. Staple or glue the ends together to hold. Let dry. 4. Punch three evenly spaced holes in the top of the windsock. Cut three pieces of string or twine about two feet long. Tie one string through each hole, and bring all three strings together above the windsock. Tie together. 5. Hang and enjoy your windsock!

Insider Crafting Tips:

* If you want your ghost to be especially eye-catching, add some glitter accents. You could line the facial features with silver glitter glue, or lightly dot craft glue in random places on the windsock, sprinkle with loose glitter, and shake off the excess. * Hang your windsock indoors and place a fan nearby to make it flutter and float as it would outside. * These make great haunted house decorations! If you don't want them to move around as much, simply make the hanging string a bit shorter.

We have found this great video for making hanging ghosts too!  Check it out:


How to Make a Bat Mobile Craft


Mobiles are perhaps best known for keeping infants occupied when in their cribs. But they also make nice decorations for all sorts of occasions. For spring, garden-themed mobiles are nice. In the winter, a mobile featuring snowmen is festive. And for Halloween, how about a mobile that includes a flock of bats?

Making a bat mobile is easy enough that young children can do it with some assistance. But it looks so great that even adults might be tempted to create one to add to their Halloween décor.

Here Is What You Need:

* Wire clothes hanger * Construction paper or card stock in black, gray, purple, dark blue and yellow * Pencil * Scissors * Glow-in-the-dark paint * Craft glue or glue stick * Googly eyes * Fiberfill * String or fishing line * Tape * Glue gun and glue sticks

Instructions

1. Draw a moon shape on the yellow card stock or construction paper. Cut out. Outline or paint the whole thing with glow-in-the-dark paint. 2. Draw a bat shape on a piece of card stock or construction paper, and cut out. To make it symmetrical, fold the paper in half and draw half a bat starting from the fold, then cut out. 3. Trace your original bat onto card stock in different colors, and cut out those bats. Make two bat shapes in each color. 4. Decorate the bats. Make accents with the glow-in-the-dark paint, and add googly eyes if you like. Be sure to only make a face on one bat of each color. Outline each bat with the paint as well, so they will be visible in the dark. Let the paint dry. 5. Cut pieces of string or fishing line in varied lengths. Lay the bats with faces face-down, and place a piece of string in the middle. Secure with craft glue. 6. Glue the other bat of the same color to the back of each bat with a face. Let glue dry. 7. Lay the clothes hanger on the table. Tie the bats to the hanger so that they hang at various lengths. 8. Using the hot glue gun, attach the fiberfill to the hanger. Cover it as well as possible, but make sure that the hook sticks out so that you can hang your mobile. When you're finished, it should look like a puffy cloud. 9. Glue the moon to the cloud. Let dry, and hang your bat mobile for all to see.


Insider Crafting Tips:

* For best results, use a hanger with a cardboard sleeve on the bottom. The bats will stay in place much better. * If you prefer, you could decorate the moon and bats with glitter glue instead of glow-in-the-dark paint.

Watch this video for some more neat ideas!  Happy Halloween!

4 Fabulous Halloween Craft Ideas for the Whole Family

Halloween is always loads of fun for kids.  They have a blast choosing their costumes, dressing up, and collecting free candy.  But if you're looking for an occasion to create some fun crafts as a family, Halloween is a wonderful time for that as well.

There are all sorts of decorative crafts that are perfect for Halloween.  You can also make masks, treat bags and lots of other goodies.  Here are a few easy projects to get you and the kids started.

Halloween Pop-Up Cards

These make great Halloween greetings or party invitations. Here's what you'll need: * Construction paper (orange and black are good colors) * Glue * Scissors * Markers 1. Fold a piece of construction paper in half to make a card shape.

2. Make a 2 1/2 inch cut perpendicular to the fold, about 2 1/2 inches from the edge.  Make another 2 1/2 inch cut 1/2 inch from that one, and make two more cuts 2 1/2 and 3 inches from the other side.  This will leave two narrow flaps in the card.

3. Open the card and push the flaps up into the inside of it.  Close the card and press with the flaps to the inside so that they are creased.

4. Cut two ghosts, spiders, or other scary items out of construction paper.  Open the card and glue each one onto the front of one of the folded flaps.

5. Glue another piece of construction paper to the outside of your card, taking care not to glue where the flaps are.  Let dry.

6. Using markers, write a message on the card.

Paper Plate Masks

These are great additions to Halloween costumes, or just for playing pretend. You'll need the following materials: * Paper plate * Elastic * Scissors * Hole Punch * Markers * Glue * Sequins, pom-poms or other embellishments (optional) 1. Use markers to decorate the back side of a paper plate. Be sure to make the eyes big enough to see out of.

2. Cut out the eyes.

3. Add embellishments if desired.

4. Use the hole punch to make a hole in each side of the mask, taking care to keep them even.

5. Cut enough elastic to secure the mask to the wearer's head, plus a couple of extra inches.  Thread each end through one of the holes you just made and tie it securely.

Ghost Wind Socks

These spooky decorations are perfect for the front porch! Here's what you'll need to make them: * Small white poster board * Black permanent marker * Stapler * Glue * White crepe paper streamers * String, yarn or twine 1. Draw a ghost face on the white poster board using the black marker.

2. Roll the poster board into a tube shape and staple the overlapping ends together securely.

3. Cut long strips out of the crepe streamers.  Glue or staple them all around the bottom of the wind sock.

4. Cut a piece of string about 2 1/2 feet long and staple the ends to opposite sides of the top of the wind sock to hang.


Try This Free Downloadable Skeleton Craft from toucanBox:


We love getting spooky and if you do, too, you’d love the toucanBox Dancing Skeleton Puppet. You can make the craft at home, with your kids and share it with your audience! It’s super simple, lots of fun to play with and makes a great party decoration. SO LET’S MAKE IT!
YOU WILL NEED
WHAT TO DO
  1. Print out template and cut out the skeleton pieces.
  2. Use a hole punch or push a pencil through the holes on the skeleton template.
  3. Place the skeleton template face down. Lift the body piece and slot
  4. split pins through the holes of the body facing upwards. 4 Thread some string (approximately 10cm long) through one of the arm holes and tie a knot to secure it. Once you have tied the knot flatten the split pin to make it secure.
  5. Thread through the other arm and tie a knot. Again flatten the split pin and make sure the string is taut. Trim off any excess string.
  6. Repeat the process on the legs. Tip: Try and make sure the knot is positioned above the hole - this will make your skeleton dance better.
  7. Attach a piece of string approximately 40cm long to the arms and legs, tying a knot in the middle of both pieces of string as shown.
  8. Attach a piece of string through the hole above the head and hang your skeleton. Pull the bottom string to make it dance.
Go to the toucanBox website to see picture-led instructions, read the joke of the day or find more craft inspiration. 

Metal, Acrylic, and Poster Prints (from Mixbook)


You may have handled quite a bit of your holiday shopping over Black Friday and Cyber Monday, but inevitably there are a few people that have not been checked off your list. The days are not getting any longer, and you should be on the train as it pulls away from procrastination station. As always, Mixbook has you covered with some great last minute gift ideas!

Mixbook has introduced a new type of wall art – Metal, Acrylic and Poster Prints. The industrial and cool Metal Prints still have the same vibrant colors as all others but with an edge. Rugged enough for a man cave and sturdy enough to withstand kiddo-traffic heavy spaces. They come ready to hang and won't shatter if they are dropped.  

If you are looking for the perfect gift for the person who has everything, look no further. Mixbook's curved Metal Prints are your answer. With a unique curved edge, this is eye catching piece will add finesse to any living or office space. Impress your hard-to-shop-for friend with this unique gift, customizable with any photo and exclusive to Mixbook's home decor collection.

Acrylic Prints have a glass-like finish with brilliant clarity. They are a sleek and contemporary eye-catching gift idea. Missing something for the friend or family member who’s basement is filled with music posters from years past? Spice up their space with another customized poster to match their collection. Select your favorite image from an old road trip and you are ready to go!

Last but certainly not least, don’t forget about Mixbook’s Instagram books and photo prints. These quick to make books are bound to make a great gift, and you already have all the photo inspiration right on your Instagram account! Act fast to make sure that all your holiday shopping gets done in plenty of time so that your only remaining task is to relax and have some egg nog.


While you're at it, you might like to check out some of their fabulous canvas prints, too!

Get the Most Out of Your Craft Fair Experience


Most crafters do what they do because they love to do it. But if you're good at a craft, it can open the door for money-making opportunities. There are all sorts of ways you can sell your crafts, including selling wholesale to retailers, placing items in consignment shops, and selling online.

But if you want to have fun and make money at the same time, craft fairs are something worth considering. Hitting the craft fair circuit gives you a reason to travel to places you may have never been before and to meet fellow crafters. And since they attract craft lovers, you can make a substantial amount of money in a short time.

Does this sound interesting to you? Here is what you need to do to get started.

Get busy crafting. You'll need plenty of inventory to take with you to the fairs for quick sales. You can also take custom orders, but most craft fair attendees prefer to leave with something in hand.

Check out the legal aspects of doing business wherever you might participate in a fair. To keep things simple, you might choose to only participate in fairs in your home state. But if you want to do business in other states, it shouldn't be too hard to get set up.

Seek out craft fairs in your area and others you are willing to travel to. Ask your crafty friends to keep you informed about any they hear about; check the newspaper and search online.

When you do find a craft fair that interests you, read the application information carefully. Most fairs will require application fees, and some are juried. You may have to pay additional fees for electricity and other amenities.

Determine what you'll need to bring along to set up. You'll definitely need tables and chairs, and many fairs do not provide them. You'll also need a tent if the fair is outdoors, and you may need other items such as display cases depending on what you're selling.

Get your office supplies together. You'll need some business cards and other promotional materials, such as receipt pads, bags, and a credit card machine if you will be accepting credit.

Price your crafts if you haven't already. Take into account all of your expenses, including travel and meals. You'll need to make enough profit to at least cover this, and of course, preferably enough to pocket some of it as take home cash.

Dress comfortably, and take along food and drinks. Bring an assistant or a friend (or two!) with you as well, if this is possible. Craft fairs are usually all-day (and sometimes multiple-day) events, so you'll need to be prepared.  Having additional support is a great gift for an adventure such as this!

Craft fairs provide the opportunity for you to sell your crafts in a fun atmosphere. But be warned: it's hard to stop at just one! Once you've experienced a craft fair first hand, chances are more than good that you'll find yourself searching the papers and internet looking for your next one.


If you're new to the wonderful world of crafting -- or even if you consider yourself to be more of a "basic" crafter -- then Cricut's brand new machine is just for you! This nifty new machine is called the Cricut Explore One™ and it's perfect for crafting beginners and basic crafters because it offers a simplified design-and-cut system that is incredibly user-friendly. The Explore One™ actually offers most of the same features as Cricut's other Explore machines, it's just priced lower!
In addition to its affordable price, here are a few other things about the Cricut Explore One™ that you're sure to love:
  • It can cut over 60 different materials, from the most delicate materials like vellum to thicker things like leather. It can also cut cardstock, vinyl, fabric, balsa wood, leather, and more…without complicated settings.
  • You'll have free access to Cricut's Design Space™ online software and iPad® app so you'll able to design on your computer or your Pad®. You'll also be able to use a Bluetooth® adapter for wireless cutting.
  • The Explore One allows you to cut a wide range of shapes and sizes with exceptional precision, from ¼" tall up to 11½" wide x 23½" tall. You just select the material that you're using on the Smart Set® dial. From there, the machine's Cut Smart® technology will deliver a clean, professional cut.
  • You can upload your own images and use your own fonts -- for free!
  • Each machine comes with over 25 free 1-click projects and 50+ free images to get them started right away.
  • If you want to use the machine to write or score, you can easily swap out the cutting cartridge with the Cricut Explore One™ Accessory Adapter and Pen.

LinkWithin

Related Posts Plugin for WordPress, Blogger...

Custom Post Signature

Custom Post  Signature